WINDOWS 10 IN-PLACE UPGRADE USING SYSTEM CENTER CONFIGURATION MANAGER 2012 R2-SP1
1.1 Prerequisites
- A System Center 2012 R2 Configuration Manager site is already installed and configured
- Configuration Manager Clients are deployed and running at least Windows 7 OS
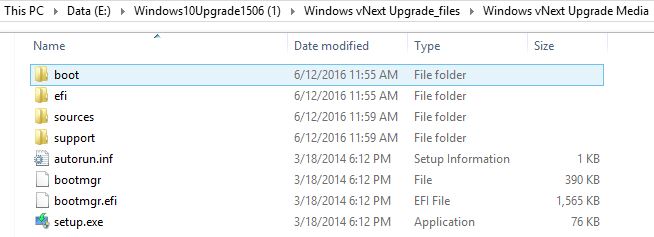
- Windows 10 Enterprise (32 and 64 Bit) media (ISO file should be extracted as pictured below).

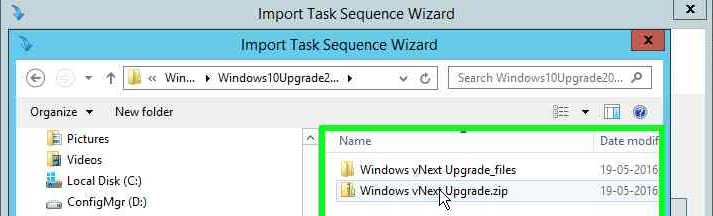
Download the Task sequence from the below URL and extract it to a network share.
It should look like below.
Windows-vNextUpgradeExport.zip
Windows-vNextUpgradeExport_files
o Windows vNext Upgrade Media (empty)
o Windows vNext Upgrade Script
https://blogs.technet.microsoft.com/enterprisemobility/2015/06/16/revised-content-for-the-windows-10-in-place-upgrade-via-task-sequence-for-configuration-manager/
1.2 Preparation of Task Sequence.
Extract the downloaded Task Sequence to our deployment root (Where we are placing all the software binaries required for SCCM)
1. Copy the contents of the Windows 10 Enterprise media into the “Windows vNext Upgrade Media” subfolder. An Upgrade package automatically creates during the Import TS process explained below (Point-3).
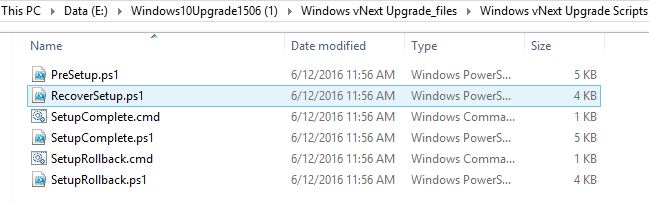
2. “Windows vNext Upgrade Scripts” folder contains the required PowerShell script during the Upgrade process. An Upgrade Script Package automatically creates during the Import TS process.
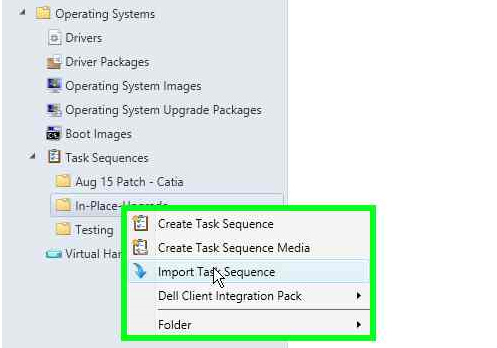
3. Open the Configuration Manager Console, switch to the Software Library workspace, expand Operating Systems, right-click Task Sequences, and select Import Task Sequence
1.3 Task Sequence Creation
1) Open the Configuration Manager Console, switch to the Software Library workspace, expand Operating Systems, right-click Task Sequences, and select Import Task Sequence
2) Browse or Enter the UNC path of vNextUpgradeExport.zip
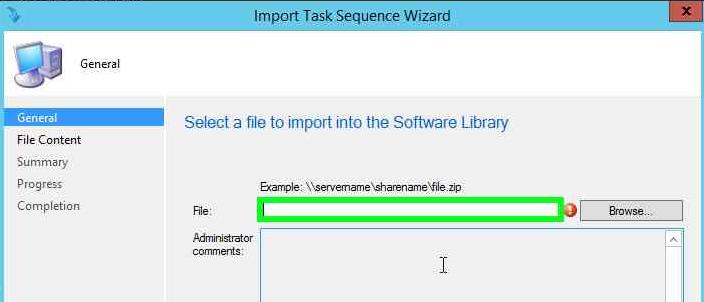
3) Select Windows-vNextUpgradeExport.zip and click Next
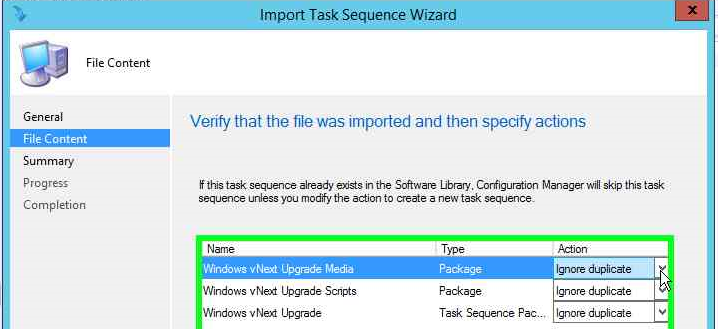
4) The File Content page will display the following objects with the action, Create New (Action will be Ignore Duplicate in case if we are tried to Import the same TS again.)
o Windows vNext Upgrade Media (Package)
o Windows vNext Upgrade Scripts (Package)
o Windows vNext Upgrade (Task Sequence Package)
5) Click on the close button from the summary page.
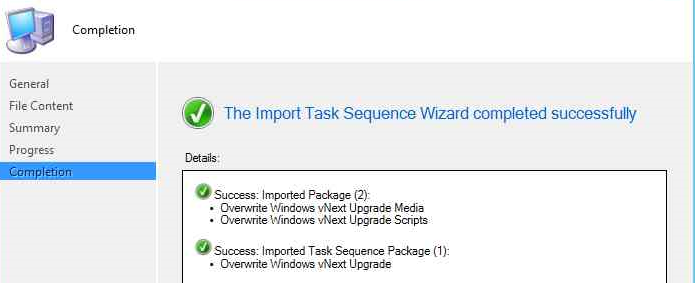
6) Windows10 Upgrade Task Sequence is ready for deployment. Distribute the Task Sequence to the appropriate distribution point – Below is the reference package that is related to the task sequence.
7) Make sure that these two packages are distributed properly before starting Upgrade.
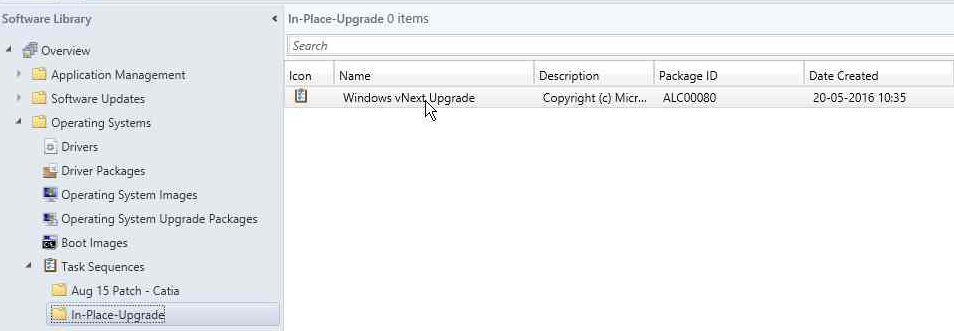
Below are the Important steps involved in the task sequence, we can Right Click on the Task sequence to edit it.

Note:
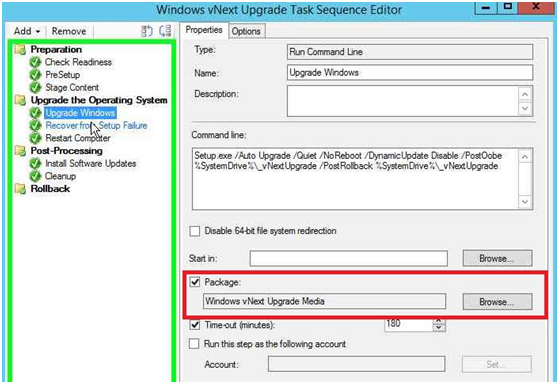
Restart: The task sequence is configured such that this step is only processed if the Upgrade Windows step succeeds. These three steps (Upgrade Windows Recover from Setup Failure, and Restart Computer) need to be kept together for the process to work properly.
· We can Modify the User Notification on Restart Window
· Message Delay can be increased as per our requirement. Default time-out will be 30 second.


These are in fact wonderful ideas in about blogging.
You have touched some good things here. Any way keep
up wrinting.