Windows Forms (Win Forms ) using PowerShell
Windows Forms is a set of managed libraries in the .NET Framework. Win-form is designed to develop client applications and it provides different kinds of controls, such as text-boxes, buttons, and web pages along with options to create custom controls.
Here I am showing how to create a GUI using win-from. This is an older way of form creation, but the base of all GUI applications.
Loading Assemblies is the first step in creating a windows form. There are two main assemblies that are required in our form creation (It may work without loading assemblies in Powershell hosts like ISE, but it won’t work if you are converting PS Scripts to . Exe and running desperately). The best practice is to load those classes in the initial stage to avoid errors
Add-Type -AssemblyName System.Windows.Forms
Add-Type -AssemblyName System.Drawing
Object Creation: We have to create a new object. This object type may differ based on our requirements. Once you create a form you have to call the form. Below is the basic example of a new object creation for a form
PART – 1 Basic of form creation
$Form = New-Object system.Windows.Forms.Form
Get member cmdlet ( $Form | gm ) will provide the details of property and method of this object and we can call the form to view the GUI using the below cmdlet
$Form.ShowDialog()
Now Combine it all together and run it from PowerShell ISE or any other host and see the output.
Add-Type -AssemblyName System.Windows.Forms
Add-Type -AssemblyName System.Drawing
$Form = New-Object system.Windows.Forms.Form
$Form.ShowDialog()
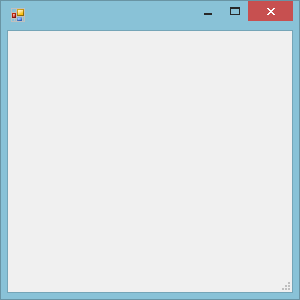
The above form is a blank one as we have not added any items to it, now we are going to add some controls on the form. Follow the below steps.
First we are defining the size of the form using the below cmdlet, we used multiple ways for defining the form size, also there is an option to set the auto-size option
$Form = New-Object system.Windows.Forms.Form
$Form.Size = New-Object System.Drawing.Size(400,200)
#You can use the below method as well
#$Form.Width = 400#$Form.Height = 200#
$Form.AutoSize = $True
$Form.AutoSizeMode = "GrowAndShrink"
$Form.Text = "My Application"
If we are using auto size with auto-size mode growandshrink, form size will automatically adjust as per the data controls that you are adding to the form.
Label Creation and customization.
$Label = New-Object System.Windows.Forms.Label
$Label.AutoSize = $true
$Font = New-Object System.Drawing.Font("Arial",15,[System.Drawing.FontStyle]::Bold)
$form.Font = $Font
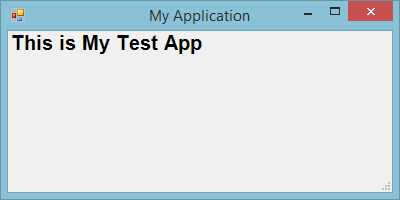
$Label.Text = "This is My Test App"
Method of Adding $Label object into $From object
$Form.Controls.Add($Label)
$Form.ShowDialog()
What we learned in 1st Part ???
Loading assembly
Creating different objects for forms
Customizing form ( By giving size and text )
Creating and customizing label and call the form for GUI
PART – 2 Form Customization:
In part-2 of form creation, we are covering the below topics.
- Creation of form closing actions
- Form Icon creation
- Form Button creation
First, add the Base form creation cmdlet
$Form = New-Object system.Windows.Forms.Form
$Form.Size = New-Object System.Drawing.Size(400,200)
$Form.Text = "My Application"
1 – Creation of form’s closing actions
$Form.Add_KeyDown({if ($_.KeyCode -eq "Enter") {$Form.Close()}})
$Form.Add_KeyDown({if ($_.KeyCode -eq "Escape") {$Form.Close()}})
$Form.Add_KeyDown({if ($_.KeyCode -eq "V") {$Form.Close()}})
2 – Form Icon Creation
We have to create a .ICO image for our form button. Either you can generate from Photoshop or you can create from online icon creation websites.
Please note the below cmdlet which is pointing to a path of the icon file.
$formIcon = New-Object system.drawing.icon ("C:vivekred.ico")
$form.Icon = $formicon
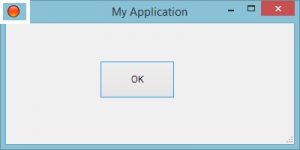
3 – Button Creation
$Okbutton = New-Object System.Windows.Forms.Button
$Okbutton.Location = New-Object System.Drawing.Size(125,50)
$Okbutton.Size = New-Object System.Drawing.Size(100,50)
$Okbutton.Text = "OK"
$Okbutton.Add_Click({$Form.Close()})
$Form.Controls.Add($Okbutton)
$Form.ShowDialog()
Now our form is ready with the Form icon and Button
Putting all the commands together: PART – 1 And PART – 2
#### I have commented out the Form ICON lines… You can enable if you have a downloaded ICON pic by providing a proper name and icon’s path ###
Add-Type -AssemblyName System.Windows.Forms
Add-Type -AssemblyName System.Drawing
$Form = New-Object system.Windows.Forms.Form
$Form.Size = New-Object System.Drawing.Size(400,200)
$Form.AutoSizeMode = "GrowAndShrink"
$Form.Text = "My Application"

$Label = New-Object System.Windows.Forms.Label
$Label.AutoSize = $true
$Font = New-Object System.Drawing.Font("Arial",15,[System.Drawing.FontStyle]::Bold)
$form.Font = $Font
$Label.Text = "This is My Test App"
$Form.Controls.Add($Label)

$Form.Add_KeyDown({if ($_.KeyCode -eq "Enter") {$Form.Close()}})
$Form.Add_KeyDown({if ($_.KeyCode -eq "Escape") {$Form.Close()}})

#$formIcon = New-Object system.drawing.icon ("C:vivekred.ico")
#$form.Icon = $formicon

$Okbutton = New-Object System.Windows.Forms.Button
$Okbutton.Location = New-Object System.Drawing.Size(125,50)
$Okbutton.Size = New-Object System.Drawing.Size(100,50)
$Okbutton.Text = "OK"

$Okbutton.Add_Click({$Form.Close()})
$Form.Controls.Add($Okbutton)

$Form.ShowDialog()
PART – 3 Creation of Button’s Click Action:
We have different options to connect the button to our script. In the previous part, I have used close() command in button click action to close the form. Now I am going to change the click action…
$Okbutton = New-Object System.Windows.Forms.Button
$Okbutton = New-Object System.Windows.Forms.Button
$Okbutton.Location = New-Object System.Drawing.Size(125,50)
$Okbutton.Size = New-Object System.Drawing.Size(200,50)
$Okbutton.Text = "Get-Service"
$Okbutton.Add_Click({Get-Service | Out-GridView})
$Form.Controls.Add($Okbutton)
function Service
{
Get-Service | Out-GridView
}
$Okbutton = New-Object System.Windows.Forms.Button
$Okbutton.Location = New-Object System.Drawing.Size(125,50)
$Okbutton.Size = New-Object System.Drawing.Size(200,50)
$Okbutton.Text = "Get-Service"
$Okbutton.Add_Click({Service})
$Form.Controls.Add($Okbutton)
$Okbutton.Location = New-Object System.Drawing.Size(125,50)
$Okbutton.Size = New-Object System.Drawing.Size(200,50)
$Okbutton.Text = "Get-Service"
$Okbutton.Add_Click({
Invoke-Expression -Command "C:Vivekservice.ps1"
})
Note: Windows form is a traditional method of form creation. We have many alternatives to create the form, like WPF with XAML, Powershell Studio from Sapien – I will be sharing the WPF method of form creation shortly-


Nice article vivek–
Bob-
Nice Blog..
thanks for posting.
I am also started building powershell GUI scripts and this blog will help me to create and understand more about windows form.
Thank You
Thank you, you can also explore WPF and XAML